1998 XM - 2.1td - Steamy Windows!

The place to show off and tell us all about your XMs (or even other cars). Should it be a big project, or just some general pics, start your thread in here.
Post Reply
turbo_imp
Knows how to use the parking brake
Posts: 120
Joined: Sun Oct 21, 2012 8:58 am

Re: 1998 XM - 2.1td - More Strut Top Pics!

Post by turbo_imp » Fri Feb 15, 2013 7:30 pm

Thats is good to know guys, I will take them off still and then check / rust cure / rebuild whilst taking good note of the condition so that I can spot and deterioration.

I must say, these forums really are fantastic. Everyone is helpful, open minded, and really willing to help to keep another XM on the road.

Thanks again everyone :)

More progress tomorrow!

J

xmexclusive
Global Moderator
Posts: 5925
Joined: Wed Apr 15, 2009 8:11 am

Re: 1998 XM - 2.1td - More Strut Top Pics!

Post by xmexclusive » Fri Feb 15, 2013 7:32 pm

Sorry the quick guide turned out so much verbiage.
We were giving opinions from just photos.
There is a risk in giving that sort of condition estimate.
You cannot examine all you want and time may well change the visible condition.
By setting down what I thought was the reasons and process used newcomers can make their own strut head assessments.
And those of us with detailed experience can extend the post, add photos or correct errors.

John

citroenxm
Global Moderator
Posts: 9987
Joined: Wed Apr 15, 2009 9:11 am
Location: North Wales - FAR far far away!!! :-p

Re: 1998 XM - 2.1td - More Strut Top Pics!

Post by citroenxm » Fri Feb 15, 2013 8:59 pm

John,

You out of most of us have the MOST experiance and knowledge on the Tops.

all Ive found that untill the cone starts pushing out then they are not too urgent..

Ive not seen XM base plates go like xantia ones, which rot away COMPLETELY, rather then push cones out downwards..

Are the XM and xantia ones made exactly the same, other then turned sphere mounts??
Projects:(eventually if theres any bodywork left)
93 L Xm 2.1t D auto project
93 L xm V6 12v Sei Manual

Others
In use.. 1995 M reg S2 2.1td auto exclusive

Dieselman
Global Moderator
Posts: 14415
Joined: Thu Jun 18, 2009 6:44 pm

Re: 1998 XM - 2.1td - More Strut Top Pics!

Post by Dieselman » Fri Feb 15, 2013 9:08 pm

The Xantia metal is thinner and due to the rubber coating allowing water to penetrate, they rot rapidly...but are cheap.
91 3.0 sei M. 4852 EXY Black
92 2.1 sed M. 5740 ECZ Sable Phenicien
92 3.0 V6-24. 5713 EXY Black
92 2.1 sd M. 5685 ENT Blue Sideral
Prev
90 2.1sd M. 5049 EJV Mandarin
92 2.1sd A. 5698 EJV Mandarin
94 2.1sd A. 6218 ERT Triton
91 2.0si M. 5187 EWT White

User avatar
White Exec
Citroen God!
Posts: 6642
Joined: Fri Mar 11, 2011 7:38 pm
Orga / RP numbers: RP7165
1996 2.5TD saloon, Exclusive, Polar White
1992 BX19D Millesime, Sable Phenicien
Location: ex-Ealing, Cheshire, W.Sussex & Surrey. Now living in Sayalonga (Malaga, Spain)

Re: 1998 XM - 2.1td - More Strut Top Pics!

Post by White Exec » Fri Feb 15, 2013 10:00 pm

John, that was an excellent detailed summary of the sources of Tops failure. Well worth putting together.
C.
Chris
1996 XM 2.5TD Exclusive RP7165 Polar White
1992 BX19D Millesime RP5800 Sable
1989 BX19RD Delage Red Deceased; 1998 ZX 1.9D Avantage auto Triton Green Company car 1998..2001; 2001 Xantia 1.8i auto Wicked Red Company car 2001..2003

turbo_imp
Knows how to use the parking brake
Posts: 120
Joined: Sun Oct 21, 2012 8:58 am

Re: 1998 XM - 2.1td - Cambelt Win!

Post by turbo_imp » Sat Feb 16, 2013 5:50 pm

I beat it! Finally got that stud out, the process is shown below but it was NOT easy :roll:

So this was the cambelt change, not very interesting but all part of the recomissioning so worth documenting I feel.

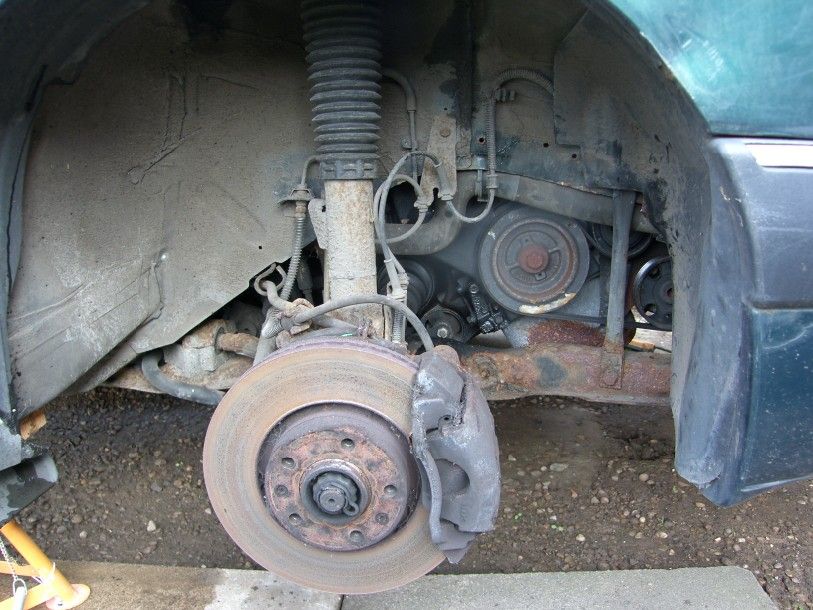
I started with the essential citroen first step to working on the car -

Image

Yep, axle stands, as well all know the suspension takes no prisoners if it decides to drop unexpectedly.

Once it was up in the air I started to follow the haynes book of lies to change the cambelt, don't you just hate it when it says 'just' or 'simply', lies I tell thee, LIES!

Wheel off and access panel removed to the lower portion of the engine -

Image

Belt covers and engine mount off -

Image

The starter motor was unbolted and an M8 bolt inserted into the flywheel to lock the crank, then two more into the fuel pump and the cam pulley. The belt was then marked in two places at each pulley, important for me to ensure that the belt goes back in the correct place regardless of tensioning.

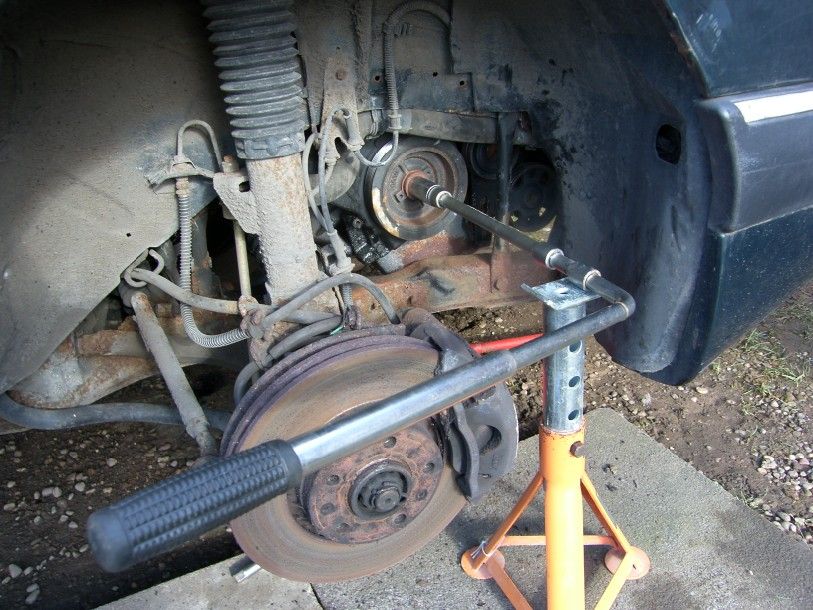
To get the crank pulley off I used a breaker bar, and a looooooong extension, this was then supported using another axle stand so that all the force would be transferred into the bolt, important as it was done up F.T.!

Image

Again the crank pulley and belt was marked up to ensure correct positioning.

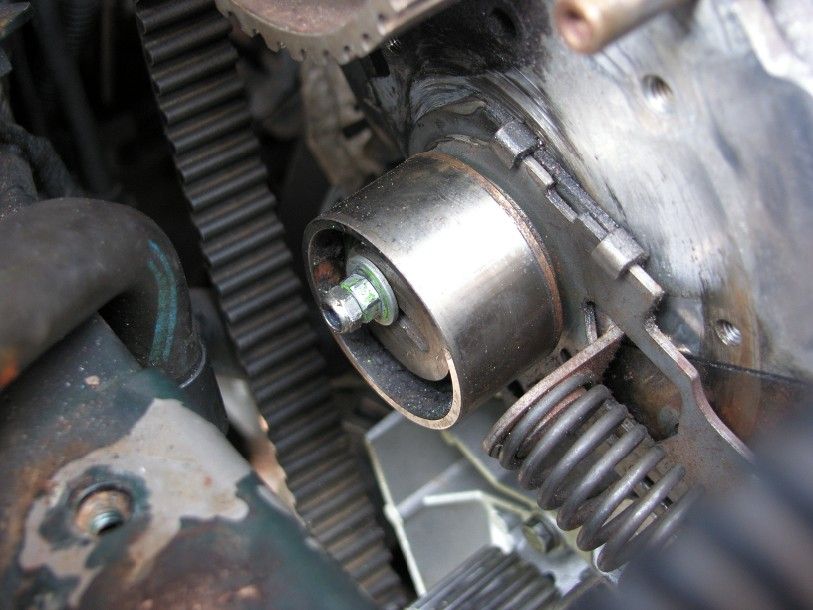
The idler pulley was replaced and then I came to the tensioner pulley, the design of this component is odd to say the least, almost impossible to remove with the engine in the car. After fighting with it for some time I decided to walk away for the day and see what I could come up with.

Image

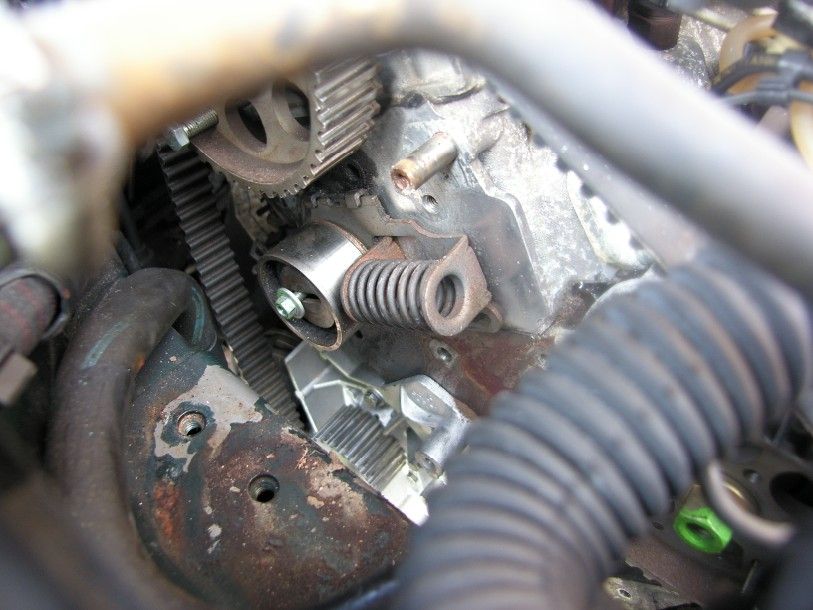
The next day I decided to take off the engine mount errrr mount? This was a struggle to get off the engine in situ, but possible. This gained access to the tensioner pulley mounting, and the stud that was such a pain to remove could at least be seen. I put two nuts on to lock against each other, even though this did not work on the previous day, I had an idea that could help. I pushed the steel pressing as far down as possible, then turned the locked nuts at he same time as rotating the pressing, this allowed just enough force to overcome the locking compound on the stud.

Image

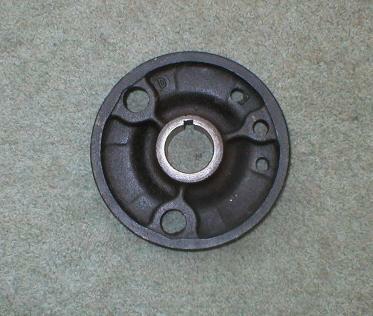
It worked! So the last old component could be removed and replaced with new :)

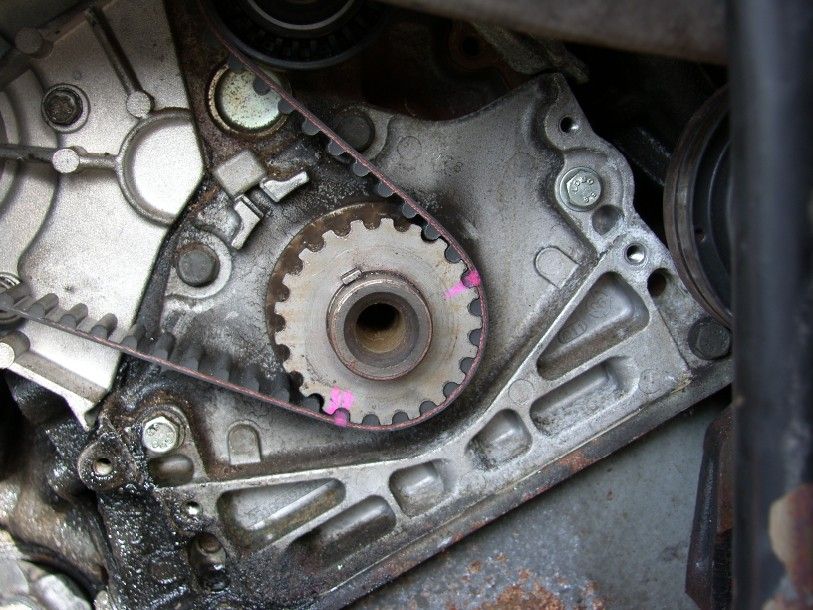
I marked up the new belt and matched the tooth count, then fitted it in place -

Image

Image

Image

Once this was sorted I started re-assembly, stopped at the earliest point and cranked the engine over by hand to ensure that there was no interference and the timing was at least close.

Then finished off, and gave it a crank, started on the button :) winner!

So the car now has a new water pump, idler puller, tensioner pulley, and belt :P

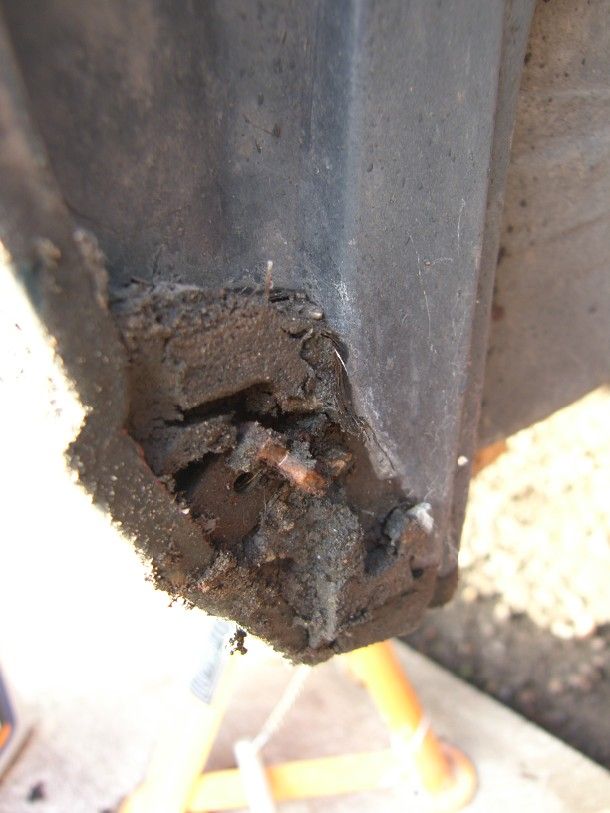
I celebrated by taking off one of the mud flaps :lol: as I know these are actually a mud trap, to see what was was hiding, lots of mud :lol:

Image

I have given it a wash in the last of the sunshine too, making the most of this glorious weather. It has been a while since spending the say outside has been pleasant!

So tomorrow as I have done some very important work, I can do some fun things, like claybar and polish the paint, wax the car and do some detailing :)

Big hugs,

J

User avatar
CitroJim
Citroen God!
Posts: 3730
Joined: Wed Apr 15, 2009 4:43 am
Location: North Bucks
Contact:

Re: 1998 XM - 2.1td - Cambelt Win!

Post by CitroJim » Sat Feb 16, 2013 6:25 pm

Excellent stuff J, a very good lot of work done there :D

I reckon your idea to support the long extension with an axle stand when undoing the crank bolt is an absolutely inspired one. Must try that next time..

2.1 tensioners are fun aren't they :twisted: I struggled with my first one because I couldn’t visualise it. Now I've done them and can picture the tensioner it's no problem. My first one was made difficult because the tensioner Allen bolt head had been chewed. I needed to use a reverse-flute socket on its head to loosen it. I then replaced it...

Great to see you really giving out the TLC to that lucky XM :D
Jim

'98 Saxo
'95 AX
Three bikes - Road, Aero and TT

Ex- owner of several XMs and many Xantias!

citroenxm
Global Moderator
Posts: 9987
Joined: Wed Apr 15, 2009 9:11 am
Location: North Wales - FAR far far away!!! :-p

Re: 1998 XM - 2.1td - Cambelt Win!

Post by citroenxm » Sat Feb 16, 2013 6:29 pm

Ah ha!

I nice clear picture of the Crank! Now, just to make a point here which I fell for!

The Key way DOES NOT and is NOT supposed to line up with the Gapped alignment next it in the Picture.. Thats for the TCT engine which it does!!

If the Timing lock is fitted to the flywheel this comes true. I made the mistake by being lazy and lined the keyway with the gap, making it a tooth out retared... Only after reassembly did I find a no go..

This shows that the 2.1 and TCT use the same block casting...
Projects:(eventually if theres any bodywork left)
93 L Xm 2.1t D auto project
93 L xm V6 12v Sei Manual

Others
In use.. 1995 M reg S2 2.1td auto exclusive

citroenxm
Global Moderator
Posts: 9987
Joined: Wed Apr 15, 2009 9:11 am
Location: North Wales - FAR far far away!!! :-p

Re: 1998 XM - 2.1td - Cambelt Win!

Post by citroenxm » Sat Feb 16, 2013 6:32 pm

CitroJim wrote: I reckon your idea to support the long extension with an axle stand when undoing the crank bolt is an absolutely inspired one. Must try that next time..
Still CANT beat a bar and socket on the bolt and a flick of the starter! Even easyer!! With no effort!

Agreed Also, nice work Imp... Ill be dooing this all soon with my own recent 2.1 SD.. but might grab the whole lot out and do clutch, Head gasket (as a matter of course) and belt all together!
Projects:(eventually if theres any bodywork left)
93 L Xm 2.1t D auto project
93 L xm V6 12v Sei Manual

Others
In use.. 1995 M reg S2 2.1td auto exclusive

User avatar
CitroJim
Citroen God!
Posts: 3730
Joined: Wed Apr 15, 2009 4:43 am
Location: North Bucks
Contact:

Re: 1998 XM - 2.1td - Cambelt Win!

Post by CitroJim » Sat Feb 16, 2013 6:39 pm

citroenxm wrote: Thats for the TCT engine which it does!!
Are you sure Paul? I'm not at all sure it does as the gapped alignment is for use with the timing hole in the crank pulley...

Which can never be relied upon of course as it's a dual-mass device but with a solid pulley it's perfect for the job..

Here's a picture of my test timing pulley for the TCT engine. The timing hole is the middle one of the group of three and it does not line up with the key-way...

Image

Or am I missing something here?
Jim

'98 Saxo
'95 AX
Three bikes - Road, Aero and TT

Ex- owner of several XMs and many Xantias!

Post Reply